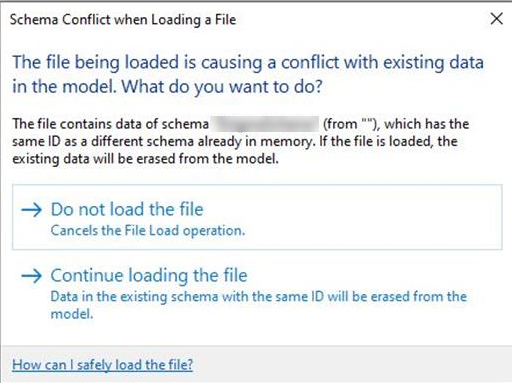
Clarity Schema Conflict Overrides (Clarity 2024)
This change is on a per Revit version basis.
For Clarity 2025, Refer to this blog post: https://imaginit.helprace.com/i659-clarity-2025-task-tray-configuration-for-error-overrides
There is a way to say “Continue Loading” for this kind of Schema Conflict dialog.

We are currently programmed to always hit “Do not load” for that specific issue, because there’s a risk of data loss. When we do that it kills the task.
IMPORTANT NOTE
Please be aware, this configuration change is at your own risk, and you understand that it will change the model during the task, and you are ok with that. For most tasks, we don't save the changes when we finish the task, but for tasks that do update the live model, it would be a synced change.
IMPORTANT VERSION NOTE
The process shown below is for Clarity 2024.0 / Clarity 2024.1. In Clarity 2025 and higher, this has been moved into the Task Tray configuration UI (although you will still need to know the details below).
Process
- Make a copy of the original config file before modifying it so you have a backup. If you edit the config file incorrectly the task server may not work.
- Rename the copy as shown below

- Exit the Clarity Task Tray
· Config file location:
- C:\Program Files\IMAGINiT Technologies\Clarity Task Server for Revit\<Revit version>\ClarityRevitTaskServerdll.config
- That is where you have the ability to specify a particular response to a particular Revit TaskDialog pop up.
- The line should already exist on newer versions of Clarity so just add the highlighted value
- It will look like this before you modify it, so add the text between the quotes, do not add any extra space nor remove the one after the last quote

- <add key="DialogOverrideOptions" value="TaskDialog_Schema_Conflict,1002" />
- Your config file should now look like the image below.
- Save the file
- If you get a permission error when trying to save, do a saveas and Save as type is All files. Save it to the desktop then drag and drop it back into the folder.

- Make sure it is still seen as a config file.
Test Clarity Task Services
- From the Desktop Icon, open Clarity Task Tray for Revit to start the task tray again.
- Send a Revit task for the version you modified the config file on to confirm that it picks up the task.
