Revit Database Export Config to Skip Tables
This change is Revit version specific!
If you are running into issues with the Revit DBExport task and want to skip certain categories, you can modify a config file to do that.
Process
This change is Revit version specific!
- You will need to log onto the task server as the designated Clarity account
- Exit the Clarity task tray
- Make a copy of the highlighted config file for the version of Revit you want to change C:\Program Files\IMAGINiT Technologies\Clarity Task Server for Revit\202#\Plugins\RevitDBExport.dll.config
- Change the extension from .config to .orig so we have a backup copy of the original settings
- Modify the .config file in Notepad
Original file
- Change this
- <!-- Skip certain tables
- <add key="SkipTables" value=""/> -->
Fixed File
Note the highlighted change. The value needs to match exactly what is in the export or it won't work.
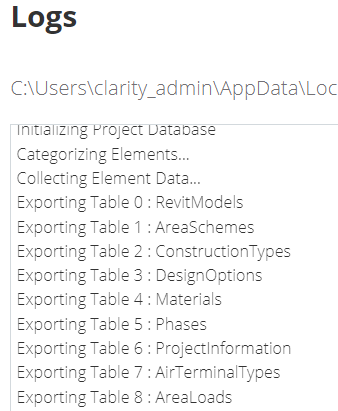
To find a list of table names, look at the logs section of a completed Revit Database Export task.

- Change the Config file value:
- <!-- Skip certain tables -->
- <add key="SkipTables" value="RoomGraphics"/>
- Save as and change to All Types
- If the file is appended with a .txt extension it will not work!
- If you can't save it in the original folder, save it to the desktop then copy it into the original folder and overwrite.
- Start the Clarity task tray
Rerun the task.